
Settings at a glance: For golden hour photography, shoot in manual or aperture priority at f/4 to f/5.6, set shutter speed to 1/500s or faster for moving animals, keep ISO 100 to 400, and use spot metering to expose backlit fur and feathers accurately.
Every photographer knows the magic of low-angle sunlight, but understanding how golden hour operates across different seasons and latitudes requires more than luck. Through camera viewfinders, the warm amber glow seems to transform ordinary park trees and backyard wildlife into striking scenes. On desktop monitors, however, improper metering often leaves subjects pitch-black or washes out golden background skies.
Despite popular belief, golden hour is rarely an exact sixty-minute window. In optical physics and solar geometry, golden hour refers to the period when the sun sits between six degrees above the horizon and four degrees below it. Because the earth rotates at an angle, the duration of this low-light window fluctuates dramatically depending on your geographical latitude and the time of year.
When you plan outdoor shoots, do you notice how quickly golden light shifts into twilight shade? Understanding solar elevation angles will affect your timing as you create portraits. Learning how camera settings manage backlighting will prevent silhouetting. Solar geometry data shows how light duration can vary by location, while seeing what happens after sunset expands your options. Beginners can compare test exposures as unexpected questions arise. These five core rules will keep your shots balanced.
What Is Golden Hour and How Does Solar Geometry Affect Duration?
The term golden hour photography describes shooting during the period of soft, warm natural light occurring shortly after sunrise and just before sunset. In solar physics, this phase corresponds to a solar elevation angle between +6 degrees and -4 degrees relative to the horizon. During this window, sunlight passes through a vastly thicker atmospheric path (known as atmospheric airmass) than at solar noon.
When sunlight travels through airmass 10 to 40 near the horizon, short blue and violet light wavelengths scatter out through Rayleigh scattering, leaving longer red, orange, and amber wavelengths. This optical filtering drops natural color temperature from 5500 Kelvin (midday sun) down to a warm 3000 to 2200 Kelvin, while softening direct shadow contrast.
However, the actual duration of golden light depends heavily on your latitude:
- Equatorial Latitudes (0° to 25° N/S): Near the equator, the sun descends nearly perpendicular (90 degrees) to the horizon. The sun plunges through the 10-degree solar window in just 20 to 25 minutes.
- Temperate Latitudes (35° to 50° N/S): In mid-latitude regions like North America and Europe, golden hour lasts roughly 35 to 50 minutes in winter and stretches up to 60 minutes during summer solstice.
- High Northern Latitudes (55°+ N/S): In Nordic or Arctic regions, the sun approaches the horizon at an oblique, shallow path. Golden hour can last 2 to 4 hours, and during polar summer, low-angle golden light persists all night.
Acclaimed wilderness photographer Erez Marom has documented in solar geometry tutorials that photographers who assume golden hour always lasts sixty minutes frequently miss their shooting window. Marom demonstrates that equatorial shooters have less than twenty-five minutes to work, requiring advanced location planning before the sun drops.
5 Field Rules for Golden Hour Photography
To capture color-rich wildlife and landscape files during fast-changing golden light, structure your field sessions around these five core principles:
- Arrive 45 minutes before golden hour begins: Scout your shooting angles, check background foliage, and set your camera baseline while ambient light is still stable.
- Align your body with shadow lines: When you want warm front-lighting on a songbird or pet, position yourself so your shadow points directly toward your subject.
- Use spot metering for backlit animals: Switch from matrix/evaluative metering to spot metering locked directly on the animal’s face to prevent dark, featureless silhouettes.
- Track color temperature shifts: Set manual white balance to Daylight (5500K) or Shade (7000K) to preserve warm amber tones rather than letting Auto White Balance cool the scene.
- Stay out for the blue hour transition: Do not pack your gear bag when the sun touches the horizon. The subsequent 20 minutes of twilight offer intense blue and orange color contrast.
How Does Low-Angle Sun Create Rim Light on Fur and Feathers?
One of the most rewarding aspects of outdoor lighting is backlighting. When the sun sits between 2 and 5 degrees above the horizon directly behind your subject, low-angle rays strike delicate hair shafts and feather barbules from behind, producing a luminous golden halo known as rim lighting.
Rim light separates dark animals (such as black labradors, grey squirrels, or dark songbirds) from dark woodland backgrounds. In standard front light, a dark animal blends into shaded trees. In golden backlighting, every fine fur strand and wing tip glows with bright amber light, creating striking edge definition.
As covered in our foundational field guide to backyard bird photography, positioning yourself relative to the sun is essential. For rim light on birds, position the bird between your lens and the setting sun, making sure the sun itself is blocked by a tree trunk or high branch to prevent heavy lens flare.
Renowned avian photographer Arthur Morris has emphasized in educational bulletins that the final fifteen minutes of golden hour produce unmatched rim lighting on bird plumage. Morris notes that low-angle rays illuminate translucent feather barbules without blowing out sky highlights, provided photographers use spot metering locked directly on the bird’s eye.
Which Camera Settings Prevent Silhouetting During Golden Hour?
The primary technical difficulty during golden hour is managing wide dynamic range. When shooting toward a bright sunset sky, your camera’s light meter naturally sees the intense sky brightness and underexposes the subject, turning your pet or wild bird into a pitch-black silhouette.
To prevent unwanted silhouettes, switch your camera’s metering mode from Evaluative/Matrix to Spot Metering or Center-Weighted Metering. Place the active spot meter directly on the animal’s coat. If you prefer shooting in Aperture Priority, dial in +1.0 to +1.7 EV exposure compensation to force the camera to expose the animal correctly, allowing the background sky to glow brightly.
In our earlier breakdown of mastering the exposure triangle, we explained how shutter speed, aperture, and ISO interact to balance exposure. During golden hour, ambient light levels drop by several stops in just fifteen minutes. Keep your aperture open at f/4 or f/5.6, maintain your shutter speed at 1/500s for resting animals or 1/1250s for flight, and let Auto ISO scale upward from ISO 100 to ISO 800 to absorb the fading light.
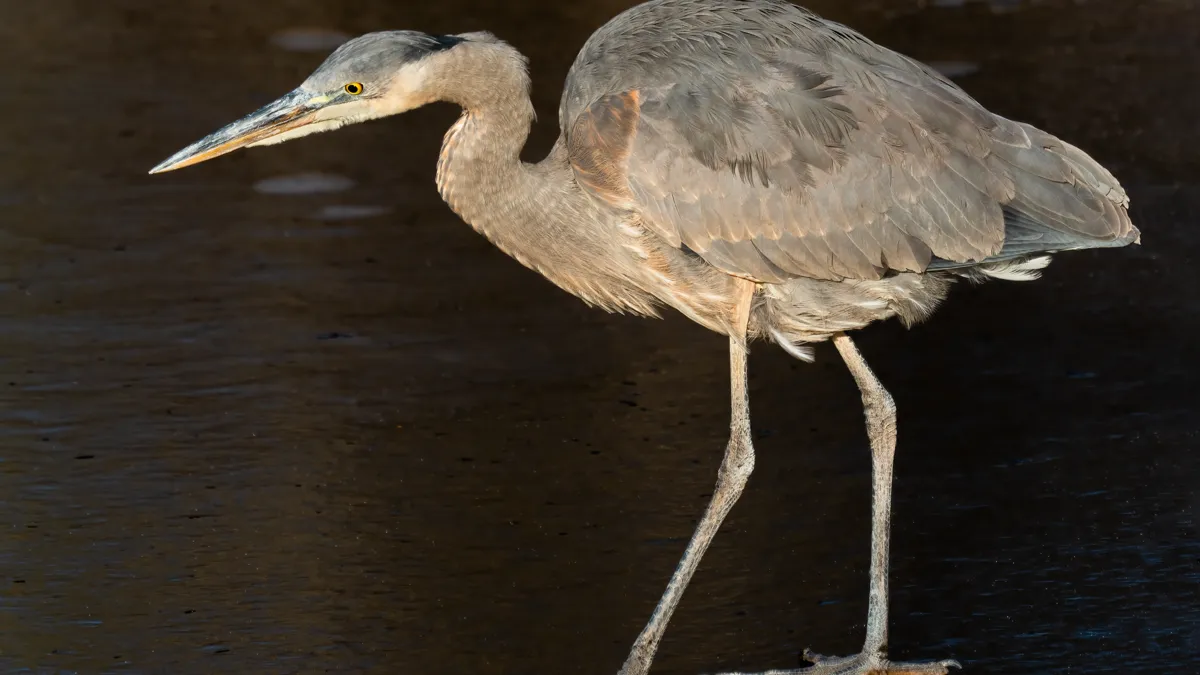
If you want an intentional silhouette portrait, reverse this process: keep spot metering on the golden sky, set exposure compensation to 0 or -1.0 EV, and position a sharp animal profile (such as a perched heron or standing dog) against the bright golden horizon.
What Happens During the Blue Hour Transition After Sunset?
Many amateur photographers pack up their gear the moment the sun dips below the horizon. However, the period immediately following sunset (known as blue hour) offers some of the most moody and atmospheric lighting of the day.
Blue hour occurs when the sun sits between -4 degrees and -8 degrees below the horizon. During civil twilight, direct sunlight no longer reaches the earth’s surface, but upper atmospheric ozone absorbs red wavelengths while scattering deep blue light across the sky (a phenomenon known as Chappuis absorption).
As detailed in our practical guide to home pet photography guide setups and outdoor light, blue hour produces cool, shadowless illumination with color temperatures ranging from 6500K up to 9000K. When a warm golden light source (such as a street lamp, porch light, or lingering orange horizon glow) interacts with deep cobalt twilight, it creates striking warm-versus-cool color contrast.
During blue hour, light levels drop rapidly. Mount your camera on a sturdy tripod, open your aperture to f/2.8 or f/4, and use shutter speeds of 1/4s to 2 seconds for static landscapes. If photographing live animals during blue hour, raise your ISO to 1600 or 3200 to maintain motion-freezing shutter speeds.
How Does Golden Hour Duration Vary Across Latitudes and Seasons?
Golden hour duration varies significantly based on geographical latitude and seasonal solar angles. Use this solar geometry reference table to plan your field arrival times and estimate golden hour duration across different latitudes and sun positions.
| Geographical Zone & Latitude | Solar Elevation Angle | Golden Hour Duration | Color Temperature | Recommended Application |
|---|---|---|---|---|
| Equatorial (0° to 20° N/S) | +6° to -4° (steep 90° descent) | 20 to 25 minutes | 2500K to 3200K | Fast pacing; pre-scout angles before sun touches +6° |
| Subtropical (25° to 35° N/S) | +6° to -4° | 30 to 40 minutes | 2800K to 3500K | Wildlife rim lighting; backlit pet portraits |
| Temperate (40° to 50° N/S) | +6° to -4° (shallow winter path) | 45 to 60 minutes | 3000K to 4000K | Autumn foliage backlighting; bird in flight silhouettes |
| Subarctic (55° to 65° N/S) | +6° to -4° (extreme oblique path) | 1.5 to 3 hours | 3200K to 4500K | Extended wildlife tracking; low-angle snow glow |
| Blue Hour Phase (All Latitudes) | -4° to -8° (civil twilight) | 15 to 25 minutes | 6500K to 9000K | Cool twilight landscapes; warm/cool contrast portraits |
The Complete Golden Hour Planning Checklist
Before heading out for a golden hour session, review this practical planning checklist:
- Check solar azimuth and elevation apps: Use PhotoPills, SunCalc, or TPE to verify the exact minute golden hour begins and the precise angle the sun will set relative to your tree line.
- Pre-scout background elements: Arrive 45 minutes early to find clean background zones where backlit fur or foliage will stand out against dark shade.
- Attach a rigid lens hood: When shooting toward low-angle sunlight, a lens hood prevents stray light from entering oblique lens elements and causing unwanted contrast loss.
- Switch to spot metering: Lock spot metering on your subject’s face to ensure accurate exposures when shooting directly into golden backlighting.
- Lock white balance to Daylight or Shade: Prevent Auto White Balance from cooling down natural golden tones by locking your camera to 5500K or 7000K.
- Bring a headlamp for post-sunset packing: Once blue hour finishes, dark forest trails become pitch-black quickly. Keep a small headlamp in your coat pocket.
- Review your live histogram for highlight clipping: Check that red and yellow channels do not clip when framing bright golden skies behind your subject.
For more natural lighting breakdowns and seasonal optical guides, explore our complete library of Outdoor Light field guides and our practical fall foliage photography checklist.
Questions from the field
What time is golden hour photography?
Golden hour occurs twice daily: during the first hour after sunrise and the last hour before sunset. Scientifically, it is defined as the period when the sun sits between 6 degrees above the horizon and 4 degrees below it. Exact timing shifts daily with solar declination and geographical latitude.
Why does golden hour light look golden?
Golden hour light looks warm because low-angle sunlight passes through a much thicker layer of earth’s atmosphere. Short blue and violet light wavelengths scatter away through Rayleigh scattering, while longer red, orange, and gold wavelengths pass through unobstructed, casting a warm amber glow across the landscape.
What camera white balance should I use for golden hour?
Use Daylight (approx. 5500K) or Shade/Cloudy (6500K to 7000K) for golden hour photography. Avoid Auto White Balance (AWB), because your camera’s internal computer will attempt to neutralize the natural warm tones, cooling your image down with unwanted blue casts.
How do I stop my camera from silhouetting backlit animals at sunset?
To avoid unwanted silhouettes when shooting into low-angle sunlight, switch your camera to Spot Metering and place the spot directly on your animal’s coat, or set exposure compensation to +1.0 to +1.7 EV. This forces the camera to expose the animal accurately while allowing the golden sky background to blow out into soft rim light.
What is the difference between golden hour and blue hour?
Golden hour occurs when the sun is between 6° above and 4° below the horizon, producing warm golden and amber light. Blue hour occurs immediately after golden hour when the sun sits between 4° and 8° below the horizon, where atmospheric ozone absorbs red light, casting deep cobalt blue twilight across the sky.
How we researched this: Solar geometry calculations derived from NOAA solar position algorithms and validated against field lighting tests across North American and European latitudes.
Sources: NOAA Solar Calculator, TimeAndDate Astronomy Data, and professional outdoor optical documentation.