
Settings at a glance: For crisp fall foliage photography, set your camera to aperture priority or manual mode at f/8, keep ISO 100 to 200 on a sturdy tripod, and adjust shutter speed to freeze rustling leaves at 1/250s or faster. Shoot under bright overcast skies or use a circular polarizing filter to remove leaf glare.
Every autumn, thousands of photographers head into deciduous forests expecting fiery red canopies and warm golden hillsides, only to return home with washed-out, lifeless pictures. The colors that looked radiant to the naked eye often register on digital sensors as milky yellows and flat, reflective browns. This frustrating gap rarely comes from inadequate camera hardware; it stems from the physics of autumn light and the waxy surface of tree leaves.
Deciduous leaves feature an exterior cuticle layer that acts like a sea of miniature mirrors. Under harsh midday sunlight, this cuticle bounces white skylight directly into your lens, creating specular glare that dilutes rich red anthocyanin and golden carotenoid pigments. Achieving vivid autumn pictures requires deliberate control over ambient lighting, physical reflection management, and disciplined camera settings.
Whether you are photographing colorful woodland creek beds, sweeping mountain canopies, or backyard wildlife foraging among fallen leaves, this field checklist outlines seven practical rules to maximize color saturation, maintain edge sharpness, and capture authentic autumn scenes without digital over-processing.
When you explore autumn woods, do you notice how quickly changing clouds alter the forest mood? Harsh overhead sunlight cannot beat the natural softness of diffused overcast light. Learning when to use a circular filter will intensify the rich pigments of damp leaves. Beginners can compare their test exposures across different woodland angles. When unexpected questions arise during your shoot, these practical field techniques will keep your camera settings dialed in.
Why Do Overcast Skies Beat Direct Sun for Fall Foliage Photography?
The most common beginner mistake in fall foliage photography is waiting for a cloudless, sunny afternoon. Direct midday sun creates extreme dynamic range between blazing leaf highlights and pitch-black forest floor shadows. Worse, the overhead angle creates blinding white specular reflections off waxy leaf surfaces that completely bleach natural pigments.
In contrast, a bright overcast sky acts as a massive natural softbox. Thick cloud cover diffuses incoming sunlight evenly across the forest canopy, eliminating harsh shadow edges and suppressing the specular sheen on leaf cuticles. Colors that appear modest under full sunlight suddenly glow with deep, saturated warmth under cloud cover.
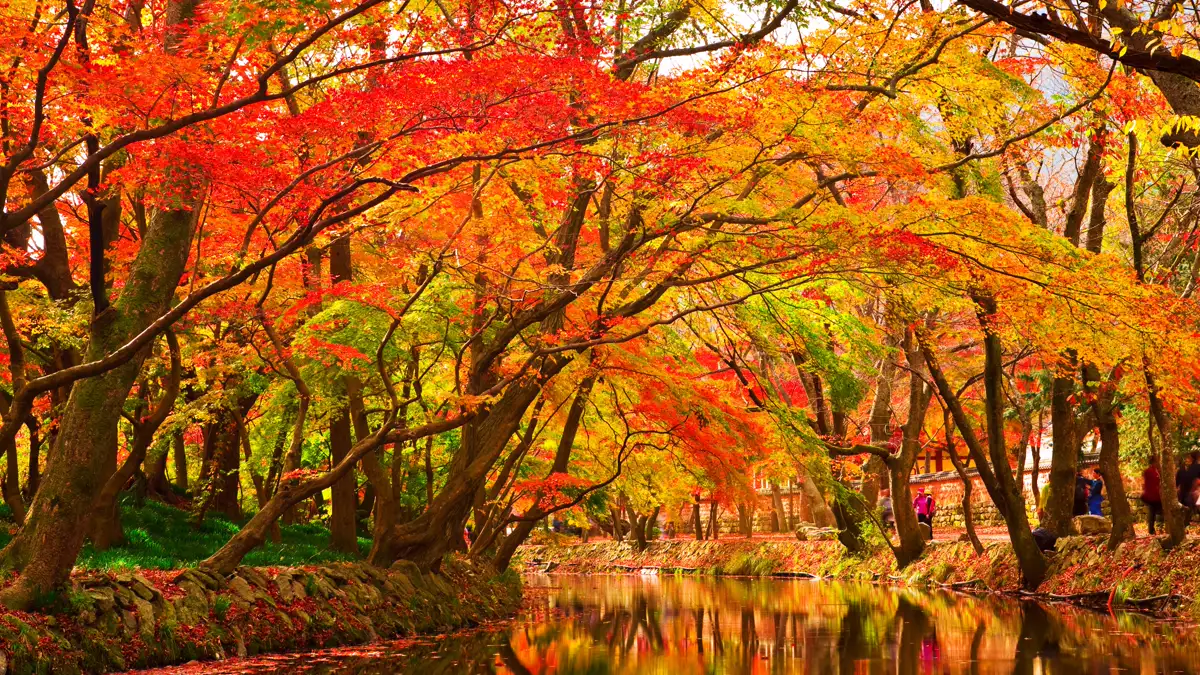
Drizzle and rainy autumn mornings offer even greater visual impact. Raindrops coat tree trunks, rocks, and leaf stems in moisture, darkening dark tones and creating intense chromatic contrast against brilliant red sugar maples and yellow birches. When paired with a circular polarizer, wet overcast foliage yields the richest color files your camera sensor can produce.
If you must shoot on sunny days, avoid front-lit canopies where the sun is directly behind your shoulder. Instead, position yourself so the sun backlights the leaves. Backlighting transforms translucent autumn leaves into glowing stained-glass lanterns, making the colors burn with radiant intensity while casting dark background branches into deep contrast.
7 Field Rules for Fall Foliage Photography
To consistently capture sharp, color-rich autumn images, structure your woodland outings around these seven proven field principles:
- Hunt for high overcast light: Plan your primary forest and stream excursions on days with thin, high cloud cover. The even illumination prevents blown highlights on pale aspen leaves and retains shadow detail across deep forest ravines.
- Attach a circular polarizing filter: A polarizing filter is the single physical accessory that digital post-processing cannot replicate. Rotating the filter cuts surface reflections from foliage, wet stones, and creek water to unlock hidden color saturation.
- Anchor your camera with a tripod: Foliage photography often requires narrow apertures like f/8 or f/11 paired with low ISO values. Under dim forest canopies or when using light-reducing polarizers, shutter speeds naturally drop below hand-holding safety thresholds.
- Watch for breeze-induced leaf motion: While a tripod eliminates camera shake, it cannot stop autumn leaves from fluttering in the wind. Always check your shutter speed: keep it at 1/250s or faster when you want razor-sharp foliage detail.
- Embrace backlighting during golden hour: During the first hour after sunrise and the final hour before sunset, low-angle light passes directly through leaves rather than reflecting off them. Point your lens toward the light source to make foliage glow.
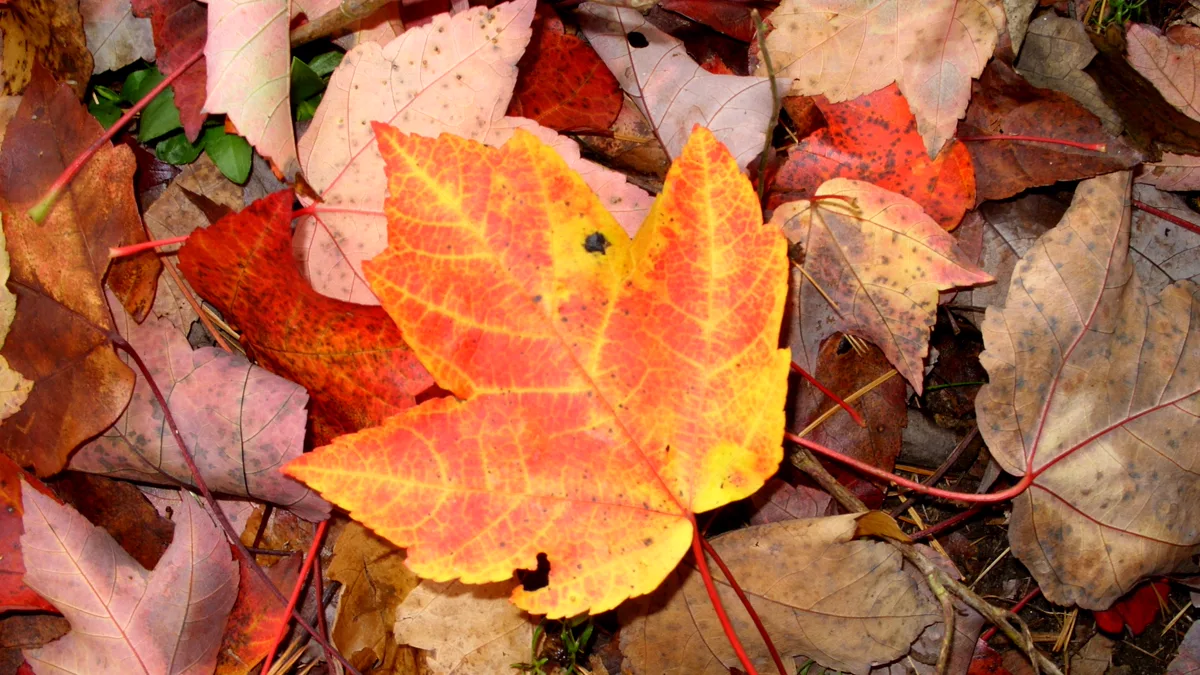
- Frame small subjects against foliage backdrops: Rather than shooting vast, chaotic panoramas of endless trees, zoom in on intimate vignettes: a solitary scarlet leaf on dark granite, an old wooden fence framed by golden hickory, or a foraging squirrel gathering acorns.
- Work beyond the peak color window: Late-season outings when fifty percent of the leaves have fallen offer exceptional creative opportunities. Wet leaf carpets on woodland trails, mossy logs covered in orange maple leaves, and bare tree branches provide structure that mid-season canopies obscure.
How Does a Circular Polarizer Intensify Wet Autumn Leaves?
If you invest in only one physical filter for autumn photography, make it a high-quality circular polarizing filter (CPL). While modern editing software can adjust global saturation, software algorithms cannot separate polarized surface glare from the underlying pigment of a leaf. A polarizer physically stops scattered light waves before they strike the camera sensor.
Using a polarizer requires active visual inspection through your viewfinder or rear LCD. As you slowly rotate the front ring of the filter, observe the leaves and water surfaces carefully. At maximum polarization (which occurs when aiming your lens roughly 90 degrees away from the sun), reflections on wet rocks vanish, revealing submerged river stones, and waxy leaf surfaces shift from shiny white-green to deep, velvety red and gold.
However, polarizers come with an essential exposure trade-off that every photographer must manage: the light penalty. A typical circular polarizing filter absorbs between 1.5 and 2 full stops of light. In an already shaded forest where ambient light measures around EV 11 or EV 12, adding a two-stop filter forces your camera to extend its shutter speed from 1/125s down to 1/30s at base ISO.
In our earlier guide to mastering the exposure triangle, we explained how aperture, shutter speed, and ISO interact to balance exposure. When your polarizer steals two stops of light, you must decide how to compensate. If the air is dead calm, letting the shutter speed drag on a solid tripod is ideal. But if autumn breezes are fluttering the canopy, you must raise your ISO to 400 or 800 to maintain the 1/250s shutter speed needed to prevent motion blur on individual leaves.
Acclaimed wilderness photographer Ian Plant has frequently pointed out in outdoor optical guides that damp, overcast weather is the premier condition for foliage photography because cloud cover acts as a giant natural softbox. Plant emphasizes that raindrops create a thin film of water on autumn foliage that amplifies surface glare, but slowly turning a circular polarizer cuts that glare entirely, unlocking deeper, richer leaf tones than direct sunny weather could ever produce.
Which Camera Settings Balance Sharp Detail and Wind Motion?
Dialing in your camera for autumn foliage requires balancing depth of field with movement control. Deciduous trees contain thousands of fine branch tips and intricate leaf margins; if your depth of field is too shallow, foreground leaves will blur into muddy distractions.
For woodland landscapes and creek scenes, set your aperture between f/8 and f/11. This range delivers edge-to-edge sharpness across standard zoom lenses while avoiding the soft optical diffraction that degrades image quality beyond f/16. Pair this aperture with your camera’s native base sensitivity, typically ISO 100, to maximize dynamic range and color tonal gradations.
The critical variable in foliage settings is shutter speed. A common beginner oversight is assuming trees are stationary subjects. Even a gentle 5 mph autumn breeze causes leaf stems to vibrate rapidly. If your camera selects a 1/15s shutter speed to accommodate low light, your branches may look sharp while the leaves turn into smeared, blurry streaks.
Adopt a conscious shutter speed rule: if you want frozen, tack-sharp foliage, keep shutter speed at 1/250s or faster. If you want to intentionally capture the flowing motion of a woodland waterfall while keeping surrounding trees crisp, wait for momentary pauses between wind gusts, or shoot two bracketed exposures from your tripod: one at 1/2s for smooth water and another at 1/320s for motionless foliage, blending them later in editing.
How Do You Photograph Wildlife in Autumn Canopies?
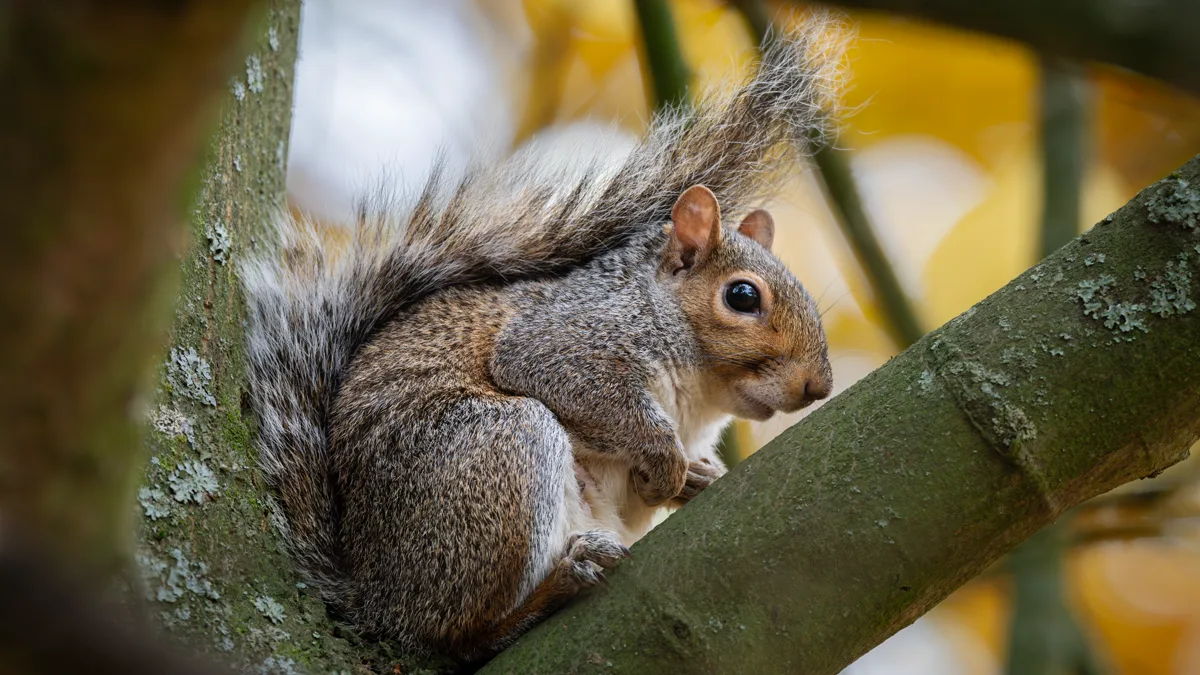
Autumn is one of the most productive seasons for animal photography because wildlife activity surges. Chipmunks, grey squirrels, white-tailed deer, and migrating passerines are frantically foraging, caching nuts, and feeding before winter arrives. The rich palette of yellow and orange leaves provides an authentic, seasonal context that elevates ordinary wildlife portraits.
However, photographing animals in autumn foliage introduces distinct technical hurdles. Dense branch patterns and contrasting leaf colors easily confuse modern autofocus systems. If you rely on wide-area multi-point autofocus, your camera will frequently latch onto a bright red foreground branch rather than the dark eye of a foraging squirrel.
To overcome autofocus confusion, switch to single-point autofocus or small zone tracking, placing the active focus point directly on the animal’s eye. Use continuous autofocus (AF-C or AI Servo) to track the animal as it hops along leaf-strewn logs. For fast-moving critters, bump your shutter speed to at least 1/1000s and open your aperture to f/5.6 to isolate the animal while rendering the surrounding foliage into soft, colorful bokeh.
As covered in our foundational tutorial on backyard bird photography, patience and ethical observation yield far better behavioral photos than chasing animals through the understory. Set up near natural feeding areas like mature oak groves or berry-laden dogwood bushes, stay low to the ground to match eye level, and let the animals move naturally into colorful patches of backlight.
Renowned wildlife photographer and conservationist Moose Peterson has documented that capturing autumn wildlife requires giving subjects breathing room within the seasonal frame. Peterson notes that filling the entire frame with just fur or feathers misses the story of autumn; incorporating the surrounding canopy of fiery reds and ambers creates environmental context. He continually reminds field shooters that animal welfare must supersede any photograph: never pursue or disturb foraging animals during this critical pre-winter feeding period.
Field rule: Never bait wild animals, shake tree branches to trigger flight, or approach feeding wildlife closer than their comfort threshold. Autumn foraging is critical for winter survival; observe quietly from behind natural cover and let wildlife forage undisturbed, in strict accordance with the Audubon Guide to Ethical Photography and NANPA field ethics.
How Do Recommended Settings Compare Across Autumn Scenes?
Use these baseline settings as practical field starting points across different outdoor lighting conditions. Always review your camera histogram after shooting to verify that yellow and red color channels remain protected from digital highlight clipping.
| Scene / Subject | Shutter Speed | Aperture | ISO Range | Recommended Filter & Light |
|---|---|---|---|---|
| Sweeping Woodland Canopy | 1/125s to 1/250s (freeze breeze) | f/8 to f/11 | ISO 100 to 200 | Circular polarizer; bright high overcast or side light |
| Forest Creek with Wet Foliage | 1/4s to 2s (smooth creek water) | f/11 | ISO 100 | CPL rotated for water clarity; calm overcast or light drizzle |
| Sunlit Backlit Leaves Vignette | 1/320s to 1/500s | f/4 to f/5.6 | ISO 100 | No polarizer; low-angle golden hour backlight |
| Active Foraging Wildlife | 1/1000s to 1/1600s | f/5.6 to f/6.3 | ISO 400 to 1600 | Lens hood without CPL; open shade or gentle backlighting |
| Forest Floor Leaf Carpet | 1/60s on tripod | f/8 | ISO 100 | CPL to cut wet leaf glare; diffused overcast shade |
The Complete Fall Foliage Field Checklist
Before packing your gear bag and heading into the autumn woods, review this practical checklist to ensure you capture clean, well-exposed files:
- Clean your front optical elements: Moisture and forest dust settle quickly on lenses and filters during damp autumn mornings. Carry clean microfiber cloths and a rocket blower.
- Verify CPL thread size: Ensure your circular polarizing filter matches your primary zoom lens diameter, or pack brass step-up rings to use one filter across multiple lenses.
- Mount a lens hood: When shooting backlit autumn foliage, a rigid lens hood shields your front glass from stray oblique sunlight, preserving optical contrast and preventing muddy flare.
- Activate your camera’s live histogram: Autumn foliage scenes feature bright yellow and orange channels that can clip before the luminance channel indicates an overexposure. Keep exposure compensation slightly negative (e.g., -0.3 EV) if yellow highlights spike.
- Bring a waterproof ground pad: Ground-level perspectives on fallen leaves and mossy logs offer unique angles. A small kneeling pad or trash bag keeps your knees dry in damp leaf litter.
- Switch white balance to Cloudy or Shade: Leaving white balance on Auto can cause the camera to neutralize warm yellow and amber tones. Setting white balance manually to Cloudy (approx. 6000K) locks in natural autumn warmth.
- Pack extra charged batteries: Cool autumn morning temperatures reduce lithium-ion battery capacity. Keep a spare battery in an inside coat pocket near body heat.
For more natural lighting tutorials and outdoor composition breakdowns, explore our complete library of Outdoor Light field guides.
Questions from the field
What camera white balance is best for fall foliage photography?
The best white balance setting for autumn leaves is Cloudy (around 6000K to 6500K) or Shade (around 7000K). If you leave your camera on Auto White Balance (AWB), the camera’s processor often attempts to neutralize the dominant golden and red tones, cooling your image down with unwanted blues. Setting Cloudy or Shade warms up the entire color balance, accentuating the natural amber tones of autumn.
Why do my fall foliage photos look dull without a polarizer?
Deciduous leaves feature a glossy, waxy cuticle layer that reflects skylight like a mirror. Under direct or scattered outdoor light, this white surface reflection mixes with the leaf’s natural pigmentation, washing out saturation. A circular polarizing filter acts as a microscopic optical grate, blocking this reflected surface glare and allowing your camera sensor to record the true red, gold, and orange pigments underneath.
How do I stop autumn leaves from blurring in the wind?
To freeze leaves rustling in an autumn breeze, you must keep your shutter speed at 1/250s or faster. Even if your camera is firmly locked onto a heavy tripod, wind will cause motion blur on individual leaf edges. If you are shooting in a dimly lit forest, raise your camera sensitivity to ISO 400 or ISO 800 to achieve a safe shutter speed while keeping your aperture stopped down to f/8 for sharp depth of field.
Is it better to photograph fall foliage when it is sunny or cloudy?
Bright overcast conditions are generally far superior to direct overhead sunshine for fall foliage. Cloud cover acts as a massive natural diffuser, eliminating harsh specular glare on leaves and balancing deep forest shadows. Direct sunlight only works well during the golden hour (early morning and late afternoon) when low sun angles backlight the leaves, making them glow from within.
Can I take good fall foliage photos after peak color has passed?
Yes, post-peak autumn conditions offer distinct creative advantages. When trees lose half their foliage, forest canopies open up, revealing interesting branch architecture, moss-covered tree bark, and rocky creek beds. The ground becomes blanketed in wet, colorful leaf carpets, creating ideal conditions for intimate macro vignettes and textured woodland floor compositions.
How we researched this: Field recommendations developed from real-world autumn landscape testing across deciduous woodlands and audited against standard optical guidelines.
Sources: Audubon Guide to Ethical Wildlife Photography, NANPA Field Ethics Code, and outdoor optical documentation.