
Settings at a glance: The exposure triangle balances aperture for depth of field, shutter speed to freeze motion, and ISO for digital sensor amplification. When backyard shots fail, follow this hierarchy: set your shutter speed to stop motion blur, open aperture for your desired focus depth, and let ISO adjust the final brightness.
Every beginning photographer knows the frustration of reviewing garden pictures on a desktop monitor. Through the tiny viewfinder, your chipmunk looked bright and clear. On a large screen, the head is blurred, the background is busy, and fine fur textures look soft. Blur ruins portraits. That painful gap between your creative intent and the camera recording happens when you do not understand the exposure triangle.
In backyard photography, camera dials work together to solve tricky exposure issues. Beginners should compare their results across different light conditions before they change any mechanical settings. When common questions arise during fast outdoor action, understanding your tools keeps you calm. Light changes fast. The exposure triangle is not difficult theory. It is the practical relationship between lens opening, shutter duration, and digital sensor amplification. Know your camera. Once you grasp how these three controls interact in shifting daylight, you stop guessing on automatic modes and begin crafting deliberate wildlife portraits.
What Is the Exposure Triangle and How Does It Work in Photography?
The exposure triangle represents the foundational framework governing how a digital camera captures light to produce an image. Coined in photographic education by instructor Bryan Peterson in his classic text Understanding Exposure, the model visualizes aperture, shutter speed, and ISO as three interconnected sides of an equilateral triangle. When you adjust one setting to admit more light, you must adjust one or both of the other two settings to maintain a balanced exposure.
Think of the exposure triangle photography model as filling an open bucket with rainwater during an afternoon downpour, where the diameter of your funnel represents aperture, the duration you hold it under the cloudburst represents shutter speed, and the internal measurement marks on the bucket represent ISO. Water fills buckets. You can catch the exact required volume of rainwater by holding a wide funnel under the sky for two seconds, or by keeping a narrow funnel open for twenty seconds. Both methods yield the exact same water volume. In digital photography, exposure measures the physical volume of light collected on your sensor.
Every photograph requires balanced illumination. Too little light produces muddy, underexposed shadows. Too much light blows out delicate feather highlights beyond rescue. Balance matters. The art of the exposure triangle lies in selecting which setting dictates your creative goal while letting the remaining two dials absorb the physical light.
If you have explored our field guide to backyard bird photography, you know that songbirds move rapidly and never cooperate with shifting backyard illumination. Wild creatures move fast. Mastering the exposure triangle gives you the mechanical confidence to react in fractions of a second when a colorful finch darts from sunlit grass into deep cedar foliage.
How Does Aperture Control Light and Background Blur?
Aperture is the physical entrance pupil inside your camera lens formed by an internal diaphragm of overlapping metal blades. It acts like an eye pupil. It opens wide in shade to gather photons and narrows in harsh midday glare. In the exposure triangle, aperture controls both the light volume entering the camera body and your optical depth of field.
Aperture is calibrated in f-stops, expressed as fractional ratios such as f/2.8, f/4, f/5.6, f/8, f/11, and f/16. Because f-stops are fractions where focal length is divided by the physical diameter of the entrance pupil, a smaller f-number denotes a larger physical opening:
- Wide apertures (f/1.8 to f/4): Large physical openings that let in maximum light while generating a shallow depth of field. This blurs cluttered backyard fences and isolates your subject against smooth, creamy background foliage.
- Medium apertures (f/5.6 to f/8): Balanced openings that provide the sweet spot of optical sharpness on most consumer telephoto zooms while keeping an entire animal head in focus from nose to ear tips.
- Narrow apertures (f/11 to f/16): Small openings that restrict light volume while expanding depth of field. Use these for wide garden vistas where you want both foreground and distant trees reasonably sharp.
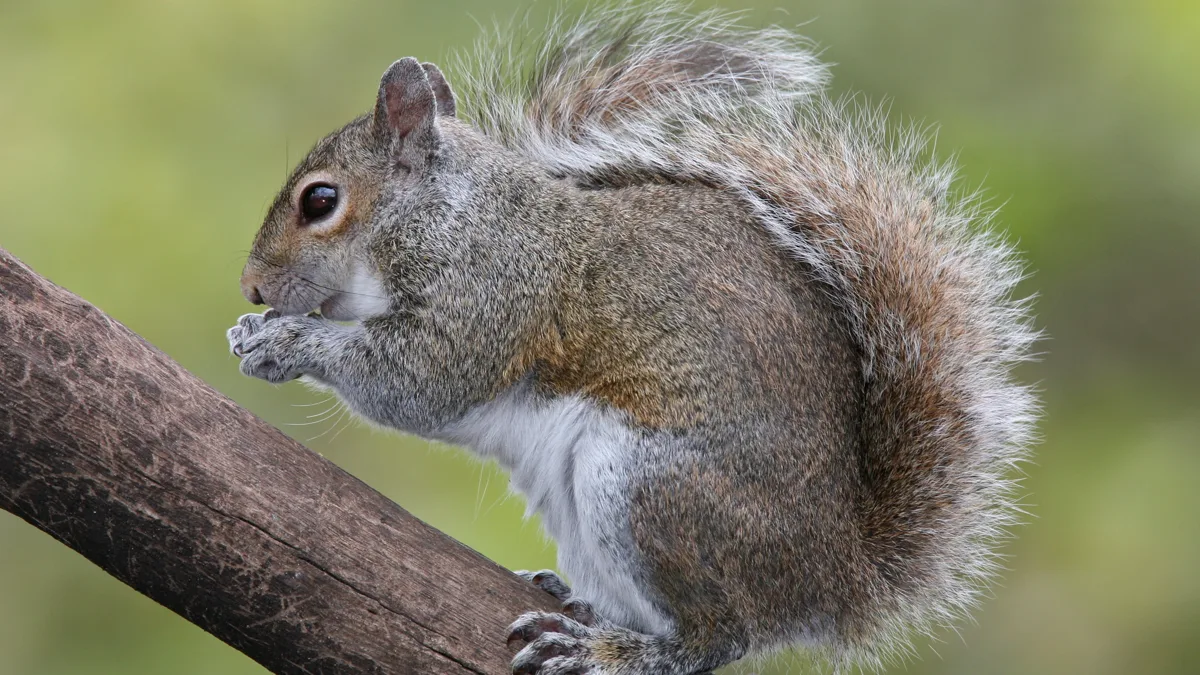
In backyard wildlife portraits, aperture creates clean separation. When an Eastern gray squirrel feeds on grass near an unsightly wire fence, shooting at f/4 blurs background clutter into soft tones. Stop down to f/11, and wire links turn sharp. Backgrounds matter. A wide aperture keeps viewer attention locked directly on your subject.
How Does Shutter Speed Freeze or Blur Action?
Shutter speed is the time your sensor remains exposed to light. Aperture controls volume. Shutter speed controls duration. In the exposure triangle, shutter speed determines whether fast movement appears crisply frozen or smeared across pixels.
Shutter speed is measured in whole seconds and fractions of a second, such as 1/60s, 1/250s, 1/1000s, or 1/2000s. Each full step faster halves the duration of light entering the sensor, while each full step slower doubles incoming light:
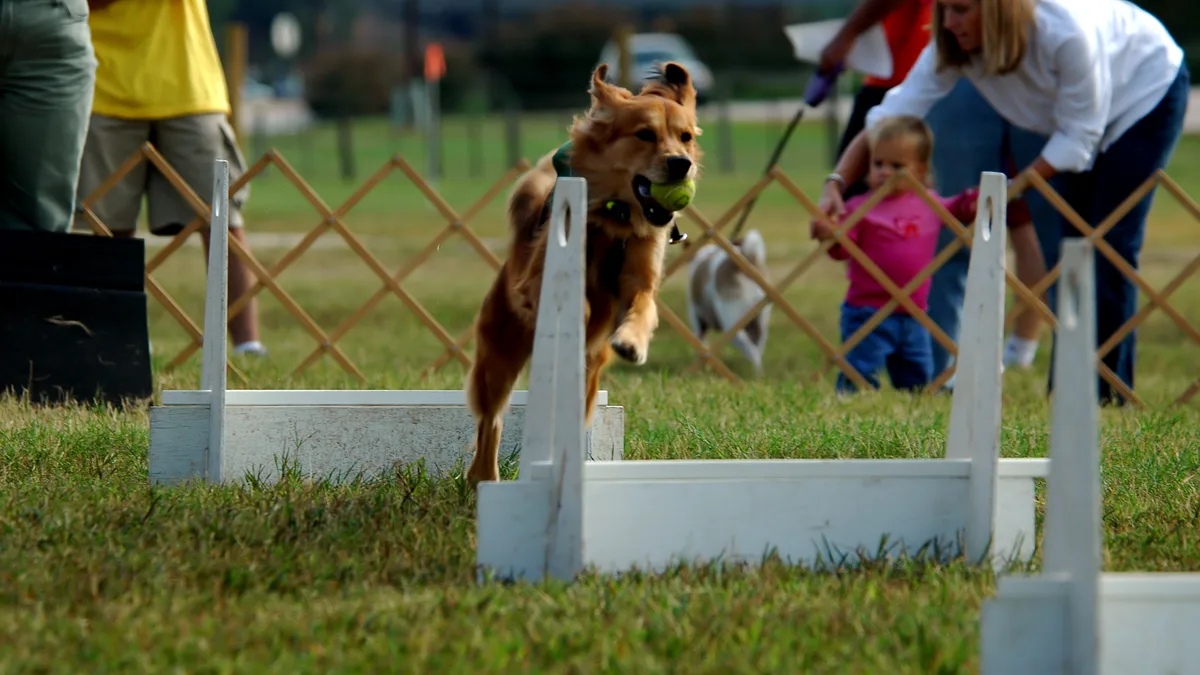
- Fast shutter speeds (1/1000s to 1/3200s): Essential for outdoor wildlife. Fast shutter speeds slice time into micro-increments, freezing hummingbird wingbeats, flying droplets at a bird bath, and rapid dog sprints across the lawn.
- Moderate shutter speeds (1/250s to 1/500s): Sufficient for calm domestic animals resting on a porch, slow-walking ducks, or larger animals chewing food without erratic head twitches.
- Slow shutter speeds (1/60s and slower): Dangerous for handholding telephoto lenses. Hand tremors cause camera shake, and slight animal movements create muddy motion blur across fur textures.
Action demands speed. The standard field threshold for sharp backyard songbirds and active pets is at least 1/1600s. Even when a bird appears motionless on a staging perch, its neck muscles twitch up to thirty times per second. Choosing an inadequate shutter speed means fine feather barbules blur together, regardless of how sharp your lens is.
How Does ISO Amplification Solve Low Light in Photography?
ISO forms the third pillar of the exposure triangle. On film, ISO measured chemical sensitivity. In digital iso photography, it represents electronic signal amplification applied to sensor pixels before writing image data to memory cards.
Base ISO delivers maximum dynamic range. Clean signals yield rich color. As you raise ISO to 800, 1600, or 3200, the camera amplifies weak signals so you can maintain fast shutter speeds in dark shade.
The trade-off of high ISO is digital noise. Amplifying a weak light signal also amplifies random background electronic static, appearing as fine grain or speckled color artifacts in shadow zones. However, beginner photographers frequently suffer from what professional wildlife instructor Steve Perry identifies as noise phobia. Beginners artificially restrict their cameras to ISO 200 or ISO 400 in shaded yards, forcing shutter speeds to drop into dangerous territory.
Noise is fixable. Blur is fatal. Sharp noise beats blurry softness every time. As Steve Perry demonstrates in field tests, modern software cleans sensor grain easily, but no software can restore feather details smeared by camera shake. In the exposure triangle, ISO is your insurance policy: let it climb so shutter speeds stay safe.
Aperture vs Shutter Speed: Which Setting Should You Prioritize First?
When beginners step into the backyard, they often experience choice paralysis when balancing aperture vs shutter speed. Both controls alter the volume of light entering the camera body, but they produce completely different aesthetic consequences. Deciding which dial to set first depends entirely on whether your scene is defined by movement or by physical depth.
In our curated Camera Settings field tutorials, we teach beginners to determine their creative priority before lifting the camera to their eye. Here is the operational distinction between aperture vs shutter speed:
- Choose Shutter Speed First for Action: If your subject moves unpredictably (a scampering puppy, a fluttering finch, a sprinting terrier), motion sharpness is your primary constraint. Set shutter speed to 1/1600s or 1/2000s first. Only after your motion threshold is locked do you open the aperture and balance ISO.
- Choose Aperture First for Still Portraits: If your subject is sleeping peacefully on a deck chair or resting calmly in open shade, you can prioritize depth of field. Set your lens to f/2.8 or f/4 to melt the background, check that your shutter speed stays safely above your lens handholding limit, and let ISO settle at a low value.
Prioritize your creative goal. When you understand the creative priority between aperture vs shutter speed, the exposure triangle ceases to feel like three random dials. One dial establishes your creative intention, the second dial supports subject sharpness, and the third dial absorbs the lighting conditions of your environment.
How Do Reciprocal Stops Work Between Backyard Sun and Shade?
To master the exposure triangle photography principles in practical shooting, you must understand the concept of stops of light. A stop is a relative unit of measurement that doubles or halves the amount of light in an exposure. The brilliance of the exposure triangle is its reciprocal nature: adjusting any setting by one stop in one direction can be exactly countered by adjusting another setting by one stop in the opposite direction.
Consider a practical backyard example. On a bright October morning, an Eastern gray squirrel sits in open sunlight on your patio grass. In direct sun, ambient light measures approximately Exposure Value (EV) 15. A standard baseline exposure for this sunlit scene might be:
Sunlit Patio Baseline: 1/2000s · f/5.6 · ISO 400 (Clean, crisp, neutral exposure in EV 15 full sunlight).
Suddenly, the squirrel spots an acorn and darts five feet into the dense shade beneath an evergreen arborvitae hedge. Under the cedar branches, ambient light plummets from EV 15 to EV 11. That is a massive 4-stop loss of light. If you leave your dials untouched, your image will turn out almost completely black.
How do you navigate this 4-stop light deficit using the exposure triangle? You evaluate your trade-offs step by step:
- Adjust shutter speed cautiously: You are shooting an active squirrel. Lowering shutter speed from 1/2000s to 1/1000s buys you exactly 1 stop of light without risking motion blur.
- Open your aperture: Moving your lens from f/5.6 to f/4 buys you another 1 stop of light. You have now recovered 2 of the 4 lost stops.
- Cover the remaining stops with ISO: Raise sensitivity from ISO 400 to ISO 1600 (a 2-stop jump: 400 → 800 → 1600).
Your new exposure under the hedge is 1/1000s · f/4 · ISO 1600. Image brightness matches your sunny shot perfectly, shutter speed remains fast enough to freeze whiskers, and modern sensor technology keeps noise virtually invisible.
How Do Settings Compare Across Common Backyard Scenarios?
The following field settings comparison illustrates how the three corners of the exposure triangle adjust across common backyard wildlife and domestic pet situations:
| Subject Scenario | Target Shutter Speed | Aperture Setting | Typical ISO Range | Primary Creative Trade-Off |
|---|---|---|---|---|
| Songbird at Backyard Feeder | 1/1600s to 1/2500s | f/5.6 to f/6.3 | ISO 400 to 1600 | Freezes rapid beak and wing twitches while keeping head sharp. |
| Dog Running Across Lawn | 1/1250s to 1/2000s | f/4 to f/5.6 | ISO 250 to 800 | Locks paw motion in mid-stride; tracks movement across grass. |
| Cat Resting by Sunlit Window | 1/320s to 1/500s | f/2.8 to f/4 | ISO 100 to 400 | Maximizes background blur and eye catchlights in gentle indoor light. |
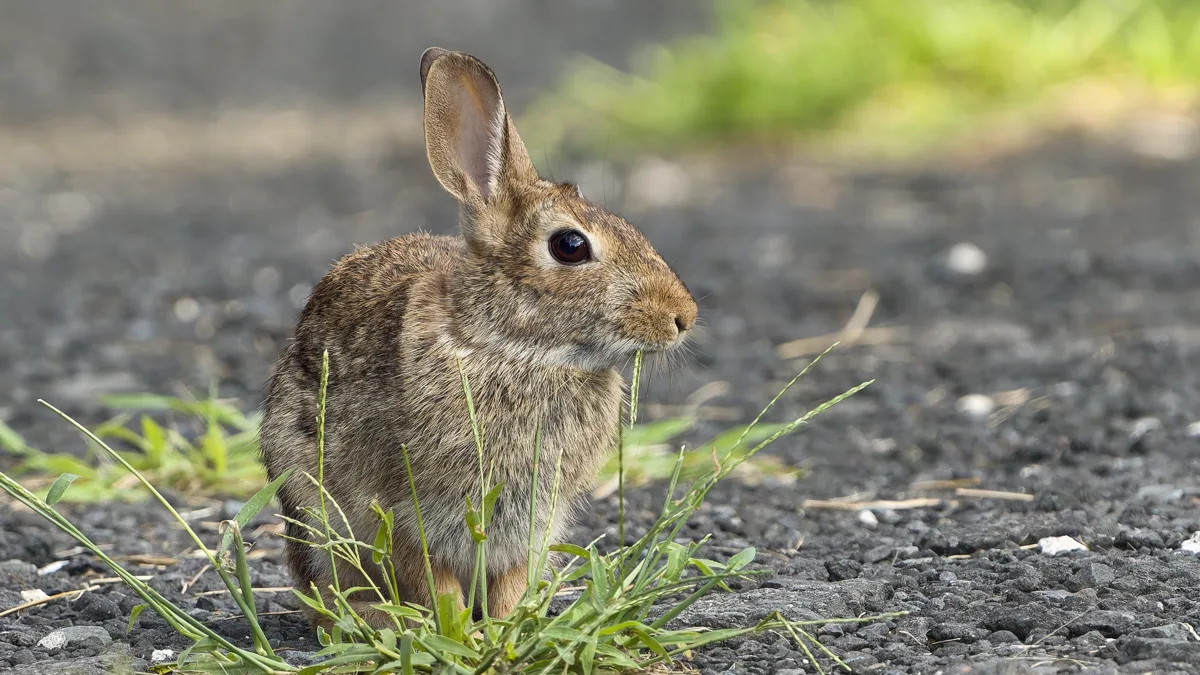
| Cottontail Rabbit in Evening Shade | 1/800s to 1/1250s | f/4 to f/5.6 | ISO 800 to 3200 | Allows ISO to climb so shutter speed stays safe in fading golden light. |
| Garden Bird Bath Water Splashes | 1/2500s to 1/4000s | f/5.6 | ISO 800 to 2500 | Suspends individual water beads mid-air; requires generous ISO headroom. |
| Static Bird on Staging Perch | 1/800s to 1/1250s | f/5.6 to f/8 | ISO 200 to 800 | Deepens depth of field so tail feathers and chest remain in crisp focus. |
What Dial Should You Change When a Shot Fails?
When you examine a test shot on your LCD screen and notice something looks wrong, do not spin random dials in frustration. Follow this logical 3-step troubleshooting decision tree based on the exposure triangle:
Step 1: Check Motion Sharpness First
Zoom in to 100% on your subject’s eye. Is the eye crisp, or is it smudged and soft? If the subject is smeared, you are suffering from motion blur or camera shake. The immediate fix: Increase your shutter speed by at least one or two full stops. Do not touch aperture or ISO until your shutter speed provides reliable edge sharpness.
Step 2: Check Depth of Field and Focus Distribution
Is the eye sharp, but the nose or tail of your pet is completely out of focus? Or is the background distracting and harsh? If depth of field is problematic, the immediate fix: Adjust your aperture. If you need more of the animal in focus, stop down from f/4 to f/6.3 or f/8. If you want to obliterate a busy brick wall or wire feeder, open your aperture to f/2.8 or f/4.
Step 3: Correct Overall Brightness with ISO or Exposure Compensation
Once shutter speed secures motion sharpness and aperture delivers your desired depth of field, evaluate overall image brightness. Is the photo too dark? Increase ISO to amplify the signal. Is the photo washed out with blown white highlights? Lower ISO toward base value. By treating ISO as the final exposure balancing tool, you never compromise subject sharpness for arbitrary noise concerns.
Why Do Wildlife Photographers Choose Manual Mode?
When you choose your camera settings deliberately, you take full command of your photographic vision. For decades, photography manuals insisted that serious photographers must shoot in full Manual mode, physically dialing aperture, shutter speed, and ISO for every single frame. While that discipline was valuable in studio settings or with mechanical film cameras, it is actively counterproductive for outdoor backyard wildlife.
When a cardinal flits between an illuminated oak branch and a shaded bird feeder, light levels shift by three to four stops in less than two seconds. If you try to manually spin your ISO wheel while tracking a bird through a telephoto lens, the bird will fly away before your thumb reaches the dial. Modern wildlife photographers employ a superior hybrid method:
The Field Workflow: Manual Mode + Auto ISO + Exposure Compensation
1. Set your camera dial to Manual Mode (M).
2. Select your required shutter speed (such as 1/1600s) to freeze motion.
3. Select your desired aperture (such as f/5.6) for lens sharpness and background separation.
4. Turn Auto ISO ON, capping the maximum limit at ISO 6400.
5. Use the Exposure Compensation dial (+/-) to fine-tune brightness. For dark birds against bright sky, dial +0.7 EV. For white birds on dark mulch, dial -0.7 EV.
Lock your physical controls. In this modern hybrid setup, you maintain absolute creative command over the two mechanical variables that govern physical image quality (shutter speed and aperture). Your camera’s advanced metering computer continuously floats the ISO to deliver exact exposure as clouds pass overhead and animals roam through sunlight and shade.
What Are the Core Rules for Balancing the Exposure Triangle?
The core rules for balancing the exposure triangle require prioritizing motion-freezing shutter speeds before adjusting aperture, using ISO as the final exposure balancing tool, and adopting a hybrid manual workflow to adapt instantly to fluctuating garden light.
- Lock in motion freeze before worrying about noise: Always choose a shutter speed fast enough to stop animal movement (1/1600s minimum for songbirds). A sharp image with slight grain is usable; a blurry image is garbage.
- Keep your aperture in the lens sweet spot: Most zoom lenses deliver optimal optical sharpness one stop down from their widest aperture, typically around f/5.6 or f/6.3.
- Do not fear ISO values up to 3200 or 6400: Modern APS-C and full-frame camera sensors preserve impressive dynamic range and fine feather textures at higher ISO settings.
- Learn the reciprocal stop relationships by heart: Remember that doubling your shutter speed cuts light in half; opening aperture by one stop doubles light; doubling ISO doubles brightness.
- Adopt Manual mode with Auto ISO as your default: Retain strict control over aperture depth and shutter motion while letting sensor gain absorb ambient light changes.
- Use Exposure Compensation for high-contrast subjects: Dial positive compensation (+0.3 to +1.0 EV) for white or backlit birds to prevent muddy, underexposed breast feathers.
- Watch for handholding focal length thresholds: When shooting handheld without optical image stabilization, keep your shutter speed at least equal to 1 divided by your focal length (1/500s on a 500mm lens).
- Practice on static garden props first: Test your exposure settings on an apple, pinecone, or stone placed on your bird feeder before wild birds arrive to establish clean baseline values.
Questions from the field
What is the most important setting in the exposure triangle for wildlife photography?
Shutter speed is the single most critical setting when photographing wild birds and pets. Because animals make sudden, unpredictable movements, an inadequate shutter speed creates permanent motion blur that ruins the image regardless of your aperture or lens sharpness.
Why are my indoor pet photos blurry even when using a wide f/1.8 aperture?
Even with an f/1.8 aperture letting in substantial light, indoor room lighting is hundreds of times dimmer than outdoor daylight. If your camera is in an automatic mode, it slows the shutter speed down to 1/15s or 1/30s to gather light, causing severe motion blur whenever your pet breathes or wags its tail. Raise your ISO to 1600 or 3200 so your shutter speed can stay above 1/250s.
Does raising ISO make my camera sensor more sensitive to light?
Technically, no. Digital sensor pixels have a fixed physical sensitivity to incoming photons. Raising the ISO dial simply applies electronic amplification (gain) to the electrical signal recorded by the pixels, brightening the resulting image while simultaneously amplifying minor electronic background static.
How do I know if my exposure triangle settings are correct before taking a photo?
Use your camera viewfinder’s exposure meter scale or live histogram. A centered meter needle indicates average neutral exposure. When reviewing images, activate the highlight alert (“blinkies”) on your LCD screen to ensure bright white feathers or sky highlights are not flashing black and blowing out.
Is letting your camera adjust ISO automatically considered cheating among professional photographers?
Not at all. Professional sports and wildlife photographers overwhelmingly rely on Manual mode paired with Auto ISO. It allows them to lock critical shutter speeds to freeze motion and select specific apertures for depth of field, while the camera adjusts ISO instantly as animals dart between sun and shadow.
Understanding camera exposure transforms backyard photography from frustrating guesswork into repeatable creative craftsmanship.
How we researched this: shutter thresholds, f-stop calculations, and sensor gain principles were verified against manufacturer camera manuals, Cambridge in Colour tutorials, and professional field testing. AI tools assisted in structural drafting; an editor verified every exposure recommendation.
Sources: Bryan Peterson (*Understanding Exposure*), Steve Perry (*Backcountry Gallery*), Cambridge in Colour, and manufacturer technical reference guides.